Decadent Chocolate Cake

Decadent Chocolate Cake anyone? How about with some ridiculously rich and creamy Chocolate Fudge Frosting?!

Yeah… THAT is what I thought!

First of all, I am constantly trying to master the moist chocolate cake. It seems so simple, and we all know it is delicious. But how do we do it? How do we create this Great White Buffalo of cakes? I am here to save you all from dry, yet sometimes tasty, chocolate cakes. I have found a combination of ingredients that finally, after years, has given me what I want…. and need! 😉

Topped with my Chocolate Fudge Frosting, this cake is to die for. I honestly meant to share it with my friend Jessica, and with the people I clean for…. but honestly…. I felt like that guy in the Hobbit who finds that ring…. (clearly not my realm). I was Bilbo and the cake was the Ring. Let it be known, I do like to share…. but every so often a gem is born in this old kitchen of mine, and I get all Queen of the Castle-ish. I can’t help it, blame my mother.

20140114_184902_resized

So, here is what you will need…

Chocolate Cake

  • 2 C. All Purpose Flour
  • 2 C. Granulated Sugar
  • 3/4 C. + 2 Tbsp. Dark Cocoa, it is so important to use good quality cocoa for this recipe
  • 2 tsp. baking Powder
  • 1 1/2 tsp. Baking Soda
  • 1 tsp. Salt
  • 1 C. Milk, I like using Whole Milk for this one
  • 1/2 C. Vegetable Oil
  • 2 Eggs
  • 1 Tbsp. Vanilla Extract
  • 1 C. Boiling Water

Chocolate Fudge Frosting

  • 1 1/3 C. Heavy Cream
  • 1 1/2 C. Sugar
  • 1 stick butter (4 oz) + 2 Tbsp
  • 6 oz. German Bakers chocolate, again good quality
  • 2 tsp. Vanilla Extract
  • a pinch or two of Salt

Here was my process…

Cake

  1. Preheat oven to 350 degrees F and prepare a 9×13″ pan, or two 9″ round pans by greasing and dusting with flour.
  2. In the bowl of your stand up mixer combine flour, sugar, cocoa, baking powder, baking soda and salt. Mix on low for about 30 seconds just until combined.
  3. Add milk, vegetable oil, eggs and vanilla. Mix on medium speed until batter is smooth.
  4. Once batter is smooth, reduce mixing speed to low and slowly, and might I add very carefully, pour boiling water into batter.
  5. Beat on high-speed for about a minute. The batter will be very thin, but be patient and let it do its magic!
  6. Pour cake batter into prepared baking pan(s).
  7. Bake at 350 degrees F for 30-35 minutes, or until a toothpick inserted into the center comes out clean.
  8. Let cool completely before frosting.

Frosting

  1. In a medium saucepan bring the cream and sugar to a boil over medium heat.
  2. Reduce heat to low to bring the mixture to a steady simmer for 6 minutes. Stir occasionally.
  3. In a separate bowl break the chocolate into pieces and add the butter, vanilla and salt.
  4. In a large bowl prepare an ice bath to place the medium bowl into.
  5. Pour cream mixture over chocolate mixture, let stand until butter and chocolate have melted, again stirring occasionally.
  6. Place chocolate mixture bowl into ice bath. ( Still in the bowl of course!!!!) Using a hand-held electric mixture beat the frosting until it becomes thick, glossy and smooth. This should take about 4 – 5 minutes.
  7. Use immediately.

This cake is a real mind blower… and I can’t encourage you enough to make this for any occasion…. literally, any occasion. That means PMS, Monday, a Doctors appointment, a birthday, Tuesday…. you name it. Talk about versatile.

20140114_184846_resized

Happy Baking!

Marshmallows

Welcome to the New Year! I am very busy these days cleaning my little heart out, and I so rarely get to get back to my kitchen and do what I do best….. create wonderful treats! The adorable five-year old in my home simply adores fluffy Marshmallows…. unfortunately his palate isn’t quite as refined as I had hoped… but again, he is five! He was not a fan, but every other child and adult loved these delicious, fluffy, homemade wonderful Marshmallows. So, one child dislikes but so many others loved!

These Marshmallows are so ridiculously easy to make. This is about the fourth experiment with marshmallow madness and I am very pleased with the results. Plus the cleanup was pretty minimal considering the task! These are an oldie but a goody!

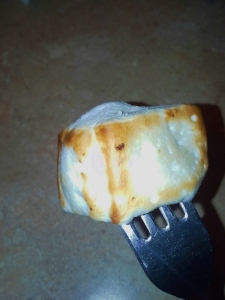
These toast just like your typical store-bought ones, only they toast a little quicker. I of course had to “toast – test” on my stove top, but it was so worth it. I can’t help but be delighted by the results. I added a few egg whites to my mixture to add a little more fluffiness and to avoid a dense, taffy-like chew. They were the perfect texture and very tasty.

20131228_174700_resized20131228_174607_resized

And, as you can see from my “toast-test” these amazingly rough cut treats toast and melt just like those jet puffed store-bought Marshmallows, only they taste one hundred times better. I had to use a fork, no judging!

20131228_174938_resized20131228_175011

Please forgive the terrible photography, I can only good at so many things! As you can see from the photos above, they toast and they come apart blissfully like we love our toasted treats to do! They smoosh like a campfire charm and bounce off of one another as I packaged them for dear friends. They keep in an airtight container for a week, but I had some a few days past and they were still very yummy!

*yields roughly 96 rough cut 1×1 inch Marshmallows

So, here is what you will need…

  • 2 TBSP plus 2 1/2 tsp. Gelatin
  • 1 C. Ice Water
  • 2 C. Granulated Sugar
  • 1/2 C. Light Corn Syrup
  • 1/4 tsp. Salt
  • 2 Egg Whites, the larger the better
  • 1 TBSP Vanilla Extract, or 1/2 of a scraped Vanilla Bean
  • Powdered Sugar, sifted,  amount may vary so just keep it on hand

Here was my process…

  1. Oil and coat with powdered sugar, a 9 x 13 x 2 inch baking pan. make sure to get the sides too!
  2. In the large bowl of your fabulous standup electric mixer, pour Gelatin over 1/2 C. of Ice Water and let stand until softened.
  3. In a heavy bottomed large pot, combine Granulated Sugar, Corn Syrup, Salt and 1/2 C. Ice Water over low heat. Stir with a wooden spoon until sugar has dissolved. Once sugar has dissolved bring mixture to a boil. Using a candy thermometer and not stirring bring the mixture to 240 degrees F. This should take 11 to 13 minutes. Remove mixture from heat and pour over gelatin mixture. Stir until gelatin is dissolved.
  4. Beat on high-speed until mixture is white, fluffy and nearly tripled in size. This should take 6 or 7 minutes in a standing mixer.
  5. In a medium-sized bowl beat egg whites and vanilla until they hold stiff peaks. Add to fluffy mixture and beat until just combined.
  6. Pour mixture into prepared baking pan, and give yourself a break if you can’t get it all out of the mixing bowl, it is sticky!
  7. Sift powdered sugar over the top of the mixture in the baking pan. Make sure to completely cover the top. Any excess will fall off when you are done.
  8. Let chill uncovered in refrigerator for at least 5 hours and up to one day.
  9. Take a thin knife and separate the edges from the sheet of Marshmallow. Turn the pan over onto a baking sheet covered in parchment and using your fingertips, gently loosen the edges and gently ease the Marshmallow out onto the prepared baking sheet. Once the sheet is free, roughly cut 1 inch squares and promptly roll each Marshmallow in powdered sugar to completely coat.  Brush each Marshmallow gently to remove any extra sugar. Toss in a bowl and watch them bounce off of each other.
  10. Promptly enjoy!

These marshmallows re great as a sweet treat, smooshed in a S’more or in some fancy hot cocoa… its up to you! I promise you won’t be disappointed no matter how you choose to enjoy them!

Happy Baking and Candy Making!

Pumpkin Spice Doughnuts

And hello again to you too! I have been a busy bee lately, unfortunately not doing what I love, but here I am. Up at 6am with a sad five year old, and the next thing I know I am piping my batter into the doughnut pan. Thanksgiving is upon us and who would I be if I didn’t take full advantage of my passion for pumpkin?!

I have been trying to make a great tasting doughnut that isn’t too unhealthy and that a glaze will set on. Pumpkin is very oily, which is why it can be a great substitute for oil! BUT, if you plan on baking the doughnuts, you need to make sure you use the right ratio of pumpkin to everything else 😉 Otherwise you will have one hell of a time trying to dust or ice your delicious breakfast (or anytime) treat!

For this recipe I baked my doughnuts and made sure to watch them very closely in the oven so they did not bake too long and end up dry and just plain old icky!

pd

Here is what you will need…

  • 1/2 C. Unsalted Butter, melted
  • 3 Large Eggs
  • 1 tsp. Vanilla Extract
  • 1/2 C. Light Brown Sugar, packed
  • 1/2 C. Granulated Sugar
  • 1 1/2 C. Pumpkin puree
  • 1 tsp. Cinnamon
  • 1/4 tsp. Ginger
  • 1/4 tsp. Nutmeg
  • 1/2 tsp. Salt
  • 1 1/2 tsp. Baking Powder
  • 1 3/4 C. All Purpose Flour

Vanilla Glaze:

  • 1 C. Powdered Sugar
  • 1 tsp. Vanilla Extract
  • 1 1/2 Tbsp. + 1/2 tsp.  Milk

Here was my process…

  1. Preheat oven to 350 degrees F, and grease doughnut pan(s).
  2. In stand up mixer beat together melted butter ( slightly cooled ), eggs, and vanilla until well blended.
  3. Add sugars, pumpkin, cinnamon, ginger, nutmeg and salt. Mix until combined well.
  4. Remove bowl from stand up mixer and fold in baking powder and all-purpose flour. Do not over mix the dough.
  5. Transfer dough from bowl into pastry bag. (If you do not have a pastry bag use a gallon size zip-lock bag and cut the corner off). Pipe the dough into the doughnut pan and smooth tops if necessary.
  6. Bake at 350 degrees F for 15 – 17 minutes.
  7. While doughnuts are baking prepare glaze. In a small bowl combine powdered sugar, vanilla and milk together and mix until very smooth. If you feel like the glaze is too thick add 1/4 tsp. of milk at a time until you reach the desired consistency.
  8. Allow to cool for two minutes before transferring to a wire rack to cool completely.
  9. Once cooled, glaze your little heart out! Take each doughnut and dip the top in the glaze. Allow the excess glaze to drip off before returning it to the rack.

These are a greatly delicious treat to enjoy with coffee or milk or with bacon! I am one proud mama today!

Please enjoy, and as always…..

Happy Baking!

Potato Leek Soup

Well, since my poor guy can’t eat real food yet, I wanted to make something super delicious while not being icky and mushy… like the rest of the food he can eat. Good thing this is temporary! Mashed potatoes can get so boring, although delicious, there are only so many non-dairy mashed potato recipes you can try in a week. Plus, why not make food that I can enjoy as well!? The answer, my friends, is that there is no reason not to!

SO, a few leeks, a few potatoes, some chicken stock and little fresh dill and you have yourself the best non-dairy potato leek soup you will ever try. There are minimum ingredients but don’t be fooled,  the flavor is bold and satisfying. When you are feeling completely emotionally drained and hungry, this soup will ease you right into your happy place. Serve with some popovers and you wont be anything but happy.


20131007_161643_resized

So, what you will need…

  • 3 Leeks
  • 6 Large Potatoes
  • 6 – 8 C. Chicken Stock, I prefer to use my own stock recipe, but you can use store-bought
  • 2 Tbsp. Dill, fresh and finely chopped
  • 1 Tbsp. Olive oil
  • Salt and Pepper to taste

Here was my process…

  1. In a large pot, sauté leeks in olive oil over medium high heat for about 10 minutes.
  2. Wash, peel and chop potatoes. Add to leeks and oil. sauté for another 5 minutes.
  3. Add chicken stock ( or water if you prefer). Let simmer until potatoes are soft and easily fall apart.
  4. Use immersion blender to puree soup.
  5. Add dill, salt and pepper.
  6. let simmer for about 30 minutes. Feel free to add more water if your soup is too thick.

See my popover recipe for the perfect companion to this delicious soup. Honestly, this is a real pick-me-up comfort food when times are tough. Of course, this is also a great meal for any cold weather day. Please enjoy!

Happy Soup Making!

Honey Oatmeal Cookies

So…. my poor yet amazing boyfriend has been in the hospital for a week and let me tell you, hospital “food” is not only depressing it is disgusting! After sitting in the ER on a very hard wooden chair for 13 hours, then sleeping on a very hard chair next to his bed in his hospital room, then sleeping on the hard cement floor in the waiting room…. I was hoping for at least a hot cup of joe. Of course, after a week of hell, it would be crazy to have even that. I ended up with a slightly warm cup of sludge and a questionable pastry. It was enough to make me cry. Well, cry more that is.

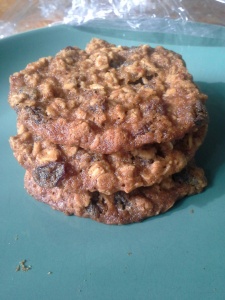
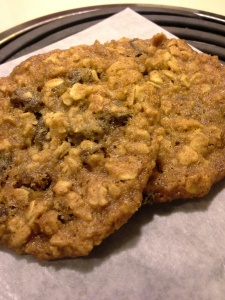
I stayed by my man, like any good woman would do, but I was suffering too! We finally came home the other day, and I was hungry, sad, happy and worried all at the same time! So… I just wanted to make myself some comfort food. What says comfort like oatmeal in cookie form? I love oatmeal raisin cookies and I love honey. The simple idea of baking them lifted my spirits and gave me the energy to take care of my still very sick boyfriend. It was just what the doctor ordered!

20131009_111259_resized

So, here is what you will need…

  • 1/2 C. Butter, softened
  • 1/4 C. Granulated Sugar
  • 1/2 C. Light Brown Sugar, packed
  • 1 tsp. Vietnamese Cinnamon
  • 1/4 tsp. Nutmeg
  • 1/2 tsp. Ginger
  • 1/2 tsp. Salt
  • 1/2 tsp. Baking Soda
  • 1 1/2 tsp. Vanilla Extract
  • I large Egg
  • 3 Tbsp. Honey
  • 3/4 C. All purpose Flour
  • 1 1/2 C. Old Fashion Oats
  • 1 1/2 C. Raisins

Here was my process…

  1. In your mixer, cream together butter, granulated sugar and brown sugar until mixture is smooth.
  2. Add spices, salt, baking soda and vanilla. Mix on a low speed until combined.
  3. Beat in Egg and Honey.
  4. Add flour and mix until combined.
  5. Add oats and raisins and mix until your dough forms. About 2 minutes.
  6. Cover tightly and chill for at least 2 hours.
  7. Once the dough has chilled, pre-heat oven to 375 degrees F and line baking sheet with parchment. Drop cookies onto prepared baking sheet. Cookies will spread out, so make sure to leave  2 inches between cookies.
  8. Bake for 10 minutes, let cool on baking sheet for 5 minutes then transfer to cooling rack.

20131006_162906_resized

Enjoy these super chewy cookies at breakfast, or lunch or really whenever you feel a little bit down. I’m telling you, after a week in the hospital watching the person you love suffer, these cookies will be like a giant hug for your soul.

Happy Baking!

Soft-Batch Chocolate Chip Cookies

First of all let me start by saying…… YES! These were such a hit in my house as well as my dear friend Jessica’s house. They passed the five-year old test and won over the thirty something crowd without any hesitation. These cookies are going to be a new classic for me, and I am proud to present that to you!

I have been a real stick in the mud the past week or so and my poor boyfriend was so overly patient and understanding of my irrational ways. I decided that the only true way to say “I’m Sorry” was with cookies. He eats and claims to like all of my baking, so I thought I would make something that he always asks for, soft-batch chocolate chip cookies. It is amazing what a little cornstarch can do to a cookie!

These cookies are chewy without being under-baked and they stay fresh for up to seven days! They are kind of a wonderful cookie. There were four other test batches before this one, and I finally got the results that I was looking for…. mouth-watering chocolaty chewy goodness.

There are a few fun little tips when trying to make a thick, chewy and soft cookie. First of all, chilling the dough results in thicker cookies. You have to chill this dough for at least 3 hours, but you can chill up to 3 days. Second, using melted butter and a dash of extra flour will result in a more chewy cookie! The Chocolate chips don’t really stick to the dough because of the butter, but if you evenly distribute them to the best of your ability, the cookies will be just fine.  You can always add more to individual cookie dough balls before baking. Using more brown sugar thank white sugar will give you a very moist and soft cookie! But finally cornstarch will give you the desired softness you have been searching for! These are simple tricks and tips to making a crowd pleasing cookie that all people can enjoy!

20130923_083741_resized

Here is what you will need…

  • 2 1/4 C. All Purpose Flour
  • 1 tsp. Baking Soda
  • 1 1/2 tsp. Cornstarch
  • 1/2 tsp. Salt
  • 3/4 C. Butter, melted, just a touch browned
  • 1 C. Brown Sugar
  • 1/4 C. Granulated Sugar
  • 1 Egg + 1 Egg Yolk
  • 2 tsp. Vanilla Extract
  • 1/4 tsp. Cinnamon
  • 1 1/4 C. Chocolate Chips

Here was my process…

  1. In a large mixing bowl lightly mix together flour, baking soda, salt and cornstarch. Place to the side.
  2. In a medium size bowl combine melted butter, brown sugar and granulated sugar. Whisk together until smooth and o lumps of sugar remain.
  3. Quickly whisk in vanilla, egg and egg yolk until well whisked!
  4. Pour butter mixture over flour mixture and mix until just combined. The dough will be very, very soft but that is how it is supposed to be!
  5. Fold in Chocolate Chips, they will not stick to the dough because of the melted butter, but again, just fold them in and you can add a few here and there if needed.
  6. Cover with plastic wrap and let chill for at least 3 hours and up to 3 days.
  7. Once chilled, let sit at room temperature for about 10 minutes. While you let the dough sit, preheat the oven to 325 degrees F and line a baking sheet with parchment paper.
  8. Roll dough into balls about 1 inch around, and place on baking mat. If you need to smush them down a bit go ahead, they will taste amazing no matter what, but the higher the ball the thicker the cookie!
  9. Bake at 325 degrees F for 10 – 12 minutes. The cookies will no look done, but take them out anyway. They bake for a little bit longer on the baking sheet. Let cookies sit on baking sheet for 9 minutes and then transfer to a wire cooling rack.

20130923_083924_resized

These cookies are so super yummy…. I am thinking about baking more right now. Not to mention they are a real treat for your tummy!

Happy Baking!

Double-Dutch Dark Cocoa Muffins

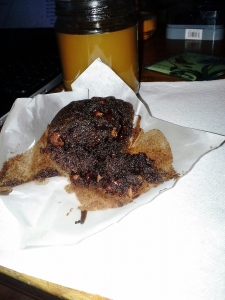
Nothing says “I love you” like fresh-baked goods containing chocolate! Well, I guess flowers might help too, wink, wink. But fresh-baked muffins for quick on the go breakfasts are just as sweet! Realistically I can’t produce a huge fantastic breakfast seven days a week, and I love any excuse to eat chocolate in the morning. I’m telling you, these muffins could be a dessert… but they are categorized as a breakfast food, thank you very much!
The key to these muffins is Double-Dutch Dark Cocoa. I buy mine from King Arthur Four, and it is the perfect combination of black cocoa and Dutch cocoa so the color is deep and rich. Not to mention the amazingly decadent flavor. This is the fanciest way to eat breakfast… at least in my house on a non-holiday.
20130903_100832_resized

Here is what you will need…

  •  1 3/4 C. All Purpose Flour
  • 3/4 C. Sugar
  • 3 Tbsp. Cocoa
  • 2 tsp. Baking Powder
  • 1/2 tsp. Baking Soda
  • 1/4 tsp. Salt
  • 1 C. Milk
  • 1/2 C. Coconut Oil ( you can use Vegetable Oil if you prefer)
  • 1 Egg
  • 1 tsp. Vanilla Extract
  • 1 C. Dark Chocolate or Semi-Sweet Chocolate Chips…. again, I prefer Ghirardelli

Here was my Process…

  1. Preheat oven to 350 degrees F and prepare muffin pan with parchment liners.
  2. In a large mixing bowl or mixer combine flour, sugar, cocoa, baking powder and baking soda. Mix gently until combined.
  3. In a small bowl whisk the egg and milk until foamy and set aside.
  4. Add oil and vanilla to dry ingredients and mix until well combined.
  5. Add milk mixture and beat until smooth.
  6. Spoon batter into prepared muffin tins. This recipe makes 12 regular sized muffins or 7 large muffins…. I know, what and odd number!
  7. Bake for 25 to 30 minutes or until toothpick comes out clean. Let cool on a wire rack, BUT… If you can, eat one while it is still warm… you can thank me later.

20130902_183615_resized

Happy Baking!

Dusted Pumpkin Cake Doughnuts

Hello! It has been far too long and I miss this greatly! I have not given up baking at all. SO….many life changes since I left, I am now living on beautiful Bainbridge Island in Washington, I have fallen deeply in love with my best friend and we are living a very happy life. It is about time! September in Washington is a little on the cool side and my favorite season, the Holliday Season, is upon us yet again! I have so many ideas and so much time to perfect them! Today, I present you with Pumpkin Cake Doughnuts! Baked not fried, and so delicious! Even kids like them… well the food adventurous ones at least.

This doughnut is as moist as a cake and the cinnamon sugar-coating makes for the perfect combination of textures! The actual doughnut is moist without being dense, and let me tell you, eighteen doughnuts seem to vanish quite quickly around here. I’m not sure if it is my guy or the five-year old, haha, lets just blame them. 😉 What can I say, they are hard not to eat!

20130916_171332_resized_2

Here is what you will need…

Doughnuts

  • 1/2 C. Vegetable Oil
  • 3 large Eggs
  • 1 1/2 C. Pumpkin Puree, I like to roast my own pumpkin…. but feel free to use canned pumpkin!
  • 1 1/2 C. Granulated Sugar
  • 1 tsp. Cinnamon
  • 1/2 tsp. Nutmeg
  • 1 1/2 tsp. Salt
  • 1 1/2 tsp. Baking Powder
  • 2 C. All Purpose flour + 1 Tbsp…. tricky I know!


Coating
1/2 C. Sugar
2 tsp. Cinnamon

Here was my process…

    1. Preheat oven to 350 degrees F and grease doughnut pan.
    2. Take a large mixing bowl with the pumpkin puree and beat eggs in one at a time until smooth. You know how I love my wooden spoons, so for this recipe I used none other than my trusty wooden spoon!
    3. Then add sugar, salt, cinnamon and nutmeg until everything is incorporated.
    4. In a separate bowl sift flour and once sifted add baking powder. ( *Make sure to add 1 Tbsp. of Flour to the 2 C.)
    5. Slowly combine the dry ingredients with the pumpkin mixture and mix until sooth, it really shouldn’t take that long.
    6. Once combined, spoon (with a regular kitchen spoon) batter into prepared doughnut pan.
    7. Bake for 15 minutes, let cool slightly on a cooling rack before coating.
    8. Once doughnuts have cooled take each doughnut and dip face down into sugar and cinnamon. It is best to place a cookie sheet under the cooling rack to catch the excess coating that falls from the doughnuts. If it is humid this might be difficult!


20130916_171322_resized_1

Enjoy with friends at the park, or at home with the family…. or sneak them with your afternoon coffee for a little extra pick-me-up!

Happy Baking!

Mom’s Carrot Cake

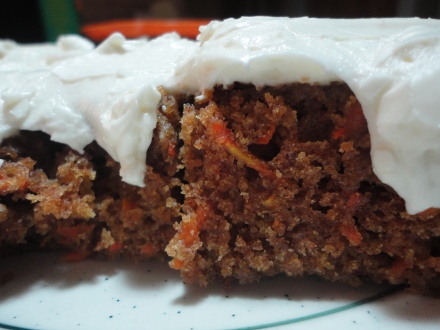
Hello all! The miserable humidity of summer has finally given way to the cold crisp air of Winter. I can finally bake without dying in my kitchen, and once again the holiday season is upon us… and I am inspired. Candy, cookies, bread and cakes! This is the best time of year, and the most fun in the kitchen. Tis the season for Butter.

For my comeback recipe I present you with my mothers Carrot Cake. It is simple, moist, delicious and elegant.This is the perfect fall or winter cake with so much flavor packed in it is hard to believe there are no secret ingredients. I do enjoy an element of surprise, but that might be best left in other areas of the house… 😉

DSC01010

So, what you will need…

  • 2 C. All-Purpose Flour
  • 2 C. Granulated Sugar
  • 2 tsp. Salt
  • 2 tsp. Cinnamon
  • 1 tsp. Baking Soda
  • 1 tsp. Baking Powder
  • 1  1/2 C. Vegetable Oil
  • 4 Eggs, well beaten
  • 2 C. Carrots, peeled and finely grated

Cream Cheese Frosting

  • 1 Stick Butter, softened
  • 8 oz. Cream Cheese, softened
  • 1 lb Powdered Sugar
  • 2 tsp. Vanilla Extract

Here was my process…

  1. Preheat oven to 325 degrees F. Grease cake pan and set aside.
  2. Combine all dry ingredients.
  3. Add Vegetable Oil, Eggs and Carrots*Make sure to beat the eggs very well and to peel and finely grate the carrots.
  4. Mix all ingredients until very well combined and pour into prepared baking pan.
  5. Bake at 325 degrees F for 30 – 35 minutes or until cake tested comes out clean.
  6.  Let cake cool completely before frosting.
  7. Combine all ingredients for the frosting in mixing bowl. For the best and the fluffiest frosting use and electric mixer!

This cake is delicious and addicting. It is great for every occasion and you can dress it up any way you could ever dream of. This cake is as moist as cake could get without falling apart… it is a cake fit for the angels.

Nothing says ‘I love you’ like a cake. 😉

Happy Baking!

Lemon Summer Muffins

Hello bakers! Well, my world has been a little upside down, so I needed to take a minute and get used to things. Unfortunately, I am not a stress baker! I choose to read and cry and drink a little wine. I just can’t help it. But I am back with a brand new computer and some fun baking inspiration. I am loving muffins that can be cupcakes, and vice versa. I wanted a little bit of sweet in my muffin, but I also wanted a little less sweet in my cupcake. So, Cupins! I don’t really like that name and the other option was Muffcakes, and…. that just wasn’t working for me either… for obvious reasons!

As much as I love chocolate, it is just too hot for such a heavy treat. But fresh lemon is the very essence of summer. It is crisp, fresh, refreshing and genuinely tasty. Everything about a lemon makes me smile. The fact that you can put it in your water, or in your cookies or in your pasta sauce just makes me love it that much more. I made a simple lemon glaze to delicately drizzle over my muffins/ cupcakes, but they are great without.

So, what you will need…

  • 1 3/4 C. All-Purpose Flour, sifted
  • 2 tsp. Baking Powder
  • 1/2 tsp. Baking Soda
  • 1/4 tsp. Salt
  • 1 Tbsp. Grated Lemon Zest
  • 2 Large Eggs
  • 1/2 C. Nonfat Milk
  • 3/4 C. Granulated Sugar
  • 6 Tbsp. Unsalted Butter, Softened
  • 1/2 C. Fresh Lemon juice
  • 1/2 C. Confectioners Sugar

Here was my process…

  1. Preheat oven to 450 degrees F. and line a muffin pan with muffin liners. This recipe makes 12 regular size muffins.
  2. In a medium-sized bowl, sift together flour, baking powder, baking soda, salt and add lemon zest. Set aside.
  3. In another bowl whisk eggs until blended.
  4. Add sugar, butter, and 1/4 C. Lemon juice to the egg mixture.
  5. Slowly add the milk and stir with a wooden spoon until smooth.
  6. Add the dry ingredients to the egg mixture and stir until just combined.
  7. Spoon the batter equally into prepared muffin tins.
  8. Bake at 400 degrees F. for 12 minutes. Let cool completely before glazing.
  9. To make the glaze take the remaining lemon juice and the confectioners sugar and combine in a bowl, stirring until smooth. Drizzle glaze over each muffin. Let set, and enjoy!

This is a super delicious, and refreshing little treat. You can have it for breakfast with a cup of tea and some blueberry yogurt, or for dessert with a scoop of frozen yogurt. These also stand well on their own. Plus you don’t have to worry about feeling gross and full, just happy and satisfied.

Happy Baking!