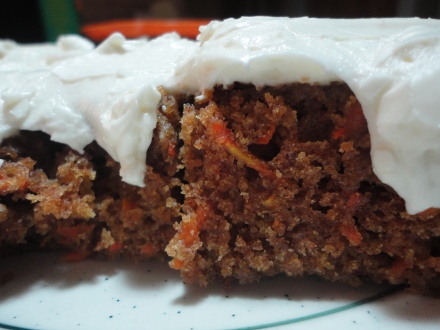
Double-Dutch Dark Cocoa Muffins

Nothing says “I love you” like fresh-baked goods containing chocolate! Well, I guess flowers might help too, wink, wink. But fresh-baked muffins for quick on the go breakfasts are just as sweet! Realistically I can’t produce a huge fantastic breakfast seven days a week, and I love any excuse to eat chocolate in the morning. I’m telling you, these muffins could be a dessert… but they are categorized as a breakfast food, thank you very much!
The key to these muffins is Double-Dutch Dark Cocoa. I buy mine from King Arthur Four, and it is the perfect combination of black cocoa and Dutch cocoa so the color is deep and rich. Not to mention the amazingly decadent flavor. This is the fanciest way to eat breakfast… at least in my house on a non-holiday.
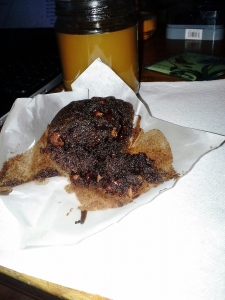
20130903_100832_resized

Here is what you will need…

  •  1 3/4 C. All Purpose Flour
  • 3/4 C. Sugar
  • 3 Tbsp. Cocoa
  • 2 tsp. Baking Powder
  • 1/2 tsp. Baking Soda
  • 1/4 tsp. Salt
  • 1 C. Milk
  • 1/2 C. Coconut Oil ( you can use Vegetable Oil if you prefer)
  • 1 Egg
  • 1 tsp. Vanilla Extract
  • 1 C. Dark Chocolate or Semi-Sweet Chocolate Chips…. again, I prefer Ghirardelli

Here was my Process…

  1. Preheat oven to 350 degrees F and prepare muffin pan with parchment liners.
  2. In a large mixing bowl or mixer combine flour, sugar, cocoa, baking powder and baking soda. Mix gently until combined.
  3. In a small bowl whisk the egg and milk until foamy and set aside.
  4. Add oil and vanilla to dry ingredients and mix until well combined.
  5. Add milk mixture and beat until smooth.
  6. Spoon batter into prepared muffin tins. This recipe makes 12 regular sized muffins or 7 large muffins…. I know, what and odd number!
  7. Bake for 25 to 30 minutes or until toothpick comes out clean. Let cool on a wire rack, BUT… If you can, eat one while it is still warm… you can thank me later.

20130902_183615_resized

Happy Baking!

Mom’s Carrot Cake

Hello all! The miserable humidity of summer has finally given way to the cold crisp air of Winter. I can finally bake without dying in my kitchen, and once again the holiday season is upon us… and I am inspired. Candy, cookies, bread and cakes! This is the best time of year, and the most fun in the kitchen. Tis the season for Butter.

For my comeback recipe I present you with my mothers Carrot Cake. It is simple, moist, delicious and elegant.This is the perfect fall or winter cake with so much flavor packed in it is hard to believe there are no secret ingredients. I do enjoy an element of surprise, but that might be best left in other areas of the house… 😉

DSC01010

So, what you will need…

  • 2 C. All-Purpose Flour
  • 2 C. Granulated Sugar
  • 2 tsp. Salt
  • 2 tsp. Cinnamon
  • 1 tsp. Baking Soda
  • 1 tsp. Baking Powder
  • 1  1/2 C. Vegetable Oil
  • 4 Eggs, well beaten
  • 2 C. Carrots, peeled and finely grated

Cream Cheese Frosting

  • 1 Stick Butter, softened
  • 8 oz. Cream Cheese, softened
  • 1 lb Powdered Sugar
  • 2 tsp. Vanilla Extract

Here was my process…

  1. Preheat oven to 325 degrees F. Grease cake pan and set aside.
  2. Combine all dry ingredients.
  3. Add Vegetable Oil, Eggs and Carrots*Make sure to beat the eggs very well and to peel and finely grate the carrots.
  4. Mix all ingredients until very well combined and pour into prepared baking pan.
  5. Bake at 325 degrees F for 30 – 35 minutes or until cake tested comes out clean.
  6.  Let cake cool completely before frosting.
  7. Combine all ingredients for the frosting in mixing bowl. For the best and the fluffiest frosting use and electric mixer!

This cake is delicious and addicting. It is great for every occasion and you can dress it up any way you could ever dream of. This cake is as moist as cake could get without falling apart… it is a cake fit for the angels.

Nothing says ‘I love you’ like a cake. 😉

Happy Baking!

Lemon Summer Muffins

Hello bakers! Well, my world has been a little upside down, so I needed to take a minute and get used to things. Unfortunately, I am not a stress baker! I choose to read and cry and drink a little wine. I just can’t help it. But I am back with a brand new computer and some fun baking inspiration. I am loving muffins that can be cupcakes, and vice versa. I wanted a little bit of sweet in my muffin, but I also wanted a little less sweet in my cupcake. So, Cupins! I don’t really like that name and the other option was Muffcakes, and…. that just wasn’t working for me either… for obvious reasons!

As much as I love chocolate, it is just too hot for such a heavy treat. But fresh lemon is the very essence of summer. It is crisp, fresh, refreshing and genuinely tasty. Everything about a lemon makes me smile. The fact that you can put it in your water, or in your cookies or in your pasta sauce just makes me love it that much more. I made a simple lemon glaze to delicately drizzle over my muffins/ cupcakes, but they are great without.

So, what you will need…

  • 1 3/4 C. All-Purpose Flour, sifted
  • 2 tsp. Baking Powder
  • 1/2 tsp. Baking Soda
  • 1/4 tsp. Salt
  • 1 Tbsp. Grated Lemon Zest
  • 2 Large Eggs
  • 1/2 C. Nonfat Milk
  • 3/4 C. Granulated Sugar
  • 6 Tbsp. Unsalted Butter, Softened
  • 1/2 C. Fresh Lemon juice
  • 1/2 C. Confectioners Sugar

Here was my process…

  1. Preheat oven to 450 degrees F. and line a muffin pan with muffin liners. This recipe makes 12 regular size muffins.
  2. In a medium-sized bowl, sift together flour, baking powder, baking soda, salt and add lemon zest. Set aside.
  3. In another bowl whisk eggs until blended.
  4. Add sugar, butter, and 1/4 C. Lemon juice to the egg mixture.
  5. Slowly add the milk and stir with a wooden spoon until smooth.
  6. Add the dry ingredients to the egg mixture and stir until just combined.
  7. Spoon the batter equally into prepared muffin tins.
  8. Bake at 400 degrees F. for 12 minutes. Let cool completely before glazing.
  9. To make the glaze take the remaining lemon juice and the confectioners sugar and combine in a bowl, stirring until smooth. Drizzle glaze over each muffin. Let set, and enjoy!

This is a super delicious, and refreshing little treat. You can have it for breakfast with a cup of tea and some blueberry yogurt, or for dessert with a scoop of frozen yogurt. These also stand well on their own. Plus you don’t have to worry about feeling gross and full, just happy and satisfied.

Happy Baking!

Brown Butter Cookies

I can’t resist the taste or smell of browned butter. I am feeling a little “snacky” these days, thank you nature, and all I can think about is guacamole and browned butter. So, I turned it into a cookie! Not the guac, haha, I have to let perfection lie on that one.

This cookie has a crisp delicate body that literally melts away in your mouth. The lack of egg gives it so much character, and it almost acts as a less dense shortbread. It is a very different cookie, and it is delicious and versatile.

These are a lot of recipes for this cookie out there, mine is a little different because I use a little Maple Sugar in mine. I like to pay homage to my home state in my baking. It actually really makes a difference. The taste is so smooth and savory. I like the idea of a savory cookie. Maybe next time I will toss some Taleggio Cheese in there.

After spending the last few days working with chocolates, blogs are on their way, I wanted something less sweet, more satisfying . The smell wafting from the oven is worth it alone. It makes my home smell like heaven. And yes, my version of heaven is filled with butter!

So, you will need…

  • 2 Sticks Sweet Cream, Unsalted Butter
  • 2/3 C. Granulated Sugar
  • 1 Tbsp. Maple Sugar, a little maple goes a long way
  • 2 1/3 C. All-Purpose Flour
  • 1 tsp. Baking Powder
  • 1 tsp. Vanilla Extract
  • 1/2 tsp. Coarse Sea Salt, plus extra to sprinkle on top.

Here was my process…

  1. Preheat oven to 325 Degrees F. Line 2 baking sheets with parchment paper.
  2. In a heavy saucepan, melt butter on low heat until browned. About 7-9 minutes.
  3. Once butter is browned remove from heat and add granulated sugar and Maple Sugar. Stir in until well combined. Don’t wait for the sugar to dissolve because it isn’t going to. 😉 Let cool for about 5 minutes until cooled.
  4. Combine the flour and baking powder and slowly mix into the butter mixture until a smooth delicious dough forms.
  5. Roll dough into 1 inch balls and place on prepared baking sheets.  Give each ball a little room to expand.
  6. Bake at 325 degrees F. for 18-20 minutes or until edges start to look golden blonde.

You can pair this cookie with a creamy soft cheese and some fruit, or toss it on top of a nice bowl of frozen custard. There is no wrong way to eat these. Plus the smell is intoxicating, so even if you don’t like cookies, bake them! Plus it gives your guy a little something to look forward to. Which makes him super sweet and compliant 😉

Happy Baking!

Peanut Butter and Honey Hearts

Yummy Yummy people! I am loving the whole candy making thing, and since it is so hot outside, I figured why not give my oven a break. This is a super easy way to make delicious, fairly guilt free Peanut Butter Cup type treats at home.

I can honestly say that i don’t get the PB&J thing… AT ALL! It is a bizarre combination of food that just doesn’t work for me. Lots of treats involving peanut butter call for salt, but I think peanut butter is salty enough. Some say it adds to the flavor, but so does the chocolate, the honey, etc. No salt needed here. These are the perfect addition to a summer ice cream sundae!

So, you will need…

  • 2 C. Peanut Butter, use the All- Natural kind, it just tastes better!
  • 2 3/4 C. Confectioners Sugar
  • 2 Tbsp. Honey, local honey of course
  • 1/4 C. Butter, at room temperature
  • 1 C. Chocolate or Chocolate Candy Coating finely chopped, tempered for dipping

Here was my process…

  1. Combine peanut butter, butter, confectioners sugar and honey in a bowl. Mix with a wooden spoon until a thick mixture forms.
  2. Take your candy mold and fill each mold, pressing down to make sure all air bubbles have escaped.
  3. Scrape excess off top of each mold, and place in freezer for up to an hour until stiff.
  4. Pop hearts out of mold onto a piece of parchment on a baking sheet.
  5. Temper chocolate or candy coating, I used a double boiler for my candy coating but you can use the microwave too.
  6. Dip hearts into candy coating and let set.
  7. Enjoy!

These are so easy to make, and so much fun to eat. It is always nice to eat homemade candies, and they are going to make a great gift as well!

Happy Baking… or Candy Making!

Orange Honey Ice Cream Sandwiches

Yay!!! Summer is upon us and there is no end in sight. The endless possibilities of summer treats make me feel like I could bake forever! I have three pages of things I want to create and share with my loved ones. The fresh squeezed lemonade, strawberries and cream, fresh green salads… and watermelon! The flavors go on and on. For today I settled on Oranges and Honey. Yummy yummy!

I wanted a cookie that would be able to make a sort of “Dreamsicle” type Ice Cream Sandwich. SO, I made Orange Honey cookies and used some 1/2 fat vanilla bean ice cream for the filling. The ice cream complimented the cookies so well, you would think that the ice cream company had invented this cookie. Alas, it was I… just a simple baker.


So, you will need…

  • 2 C. All Purpose Flour
  • 2 tsp. Baking Soda
  • 1/4 tsp. Salt
  • 1/2 C. + 2 Tbsp. Canola Oil
  • 1/4 C. Honey
  • 1 C. Granulated Sugar
  • 1 Tbsp. Fresh Squeezed Orange Juice, yes, freshly squeezed!
  • 1 Egg

Here was my process…

  1. Preheat the oven to 350 degrees F and line baking sheets with parchment paper.
  2. In a medium bowl combine flour, baking soda and salt. Set aside.
  3. In a large bowl combine canola oil, honey, sugar, orange juice and egg. Beat with mixer of your choice until all ingredients are well combined.
  4. Pour dry mixture into wet mixture and mix until all ingredients are incorporated. DO NOT over beat.
  5. Spoon dough onto prepared baking sheets allowing room to spread.
  6. Bake at 350 degrees F for 9-11 minutes, until sides are a lovely honey brown.
  7. Remove from oven and let cool completely before creating a Cookie Ice Cream Sandwich!

These cookies are surprisingly delicious and work very well in this situation! They are also good on their own, or with milk. Milk and honey after all, are very good friends.

Happy Baking!


Honey Cinnamon Doughnuts w/ Brown Sugar Glaze (low fat!!!)

I was trying to think of the perfect Father’s day treat, and I had a few ideas, but I wanted to do something special. So, I thought of the things my dad enjoys, and Honey was right at the top of that list. And who doesn’t like a doughnut?! So, I took the ‘love of Honey’ idea and turned it into a delicious baked treat.  This is a masculine doughnut with bold flavors, yet light in consistency and low in fat. Win win!

And just like with anything else that is sweet, a little bit of honey goes a long way!

So, you will need…

  • 1 c.  Whole Wheat Pastry Flour ( makes a more tender doughnut)
  • 1/2 C. Granulated Sugar
  • 1 tsp. Baking Powder
  • 1 tsp. Cinnamon
  • 1 Tbsp. Brown Sugar
  • 1/4 tsp. Salt
  • 3 Tbsp. Canola Oil
  • 2 Large eggs
  • 2 Tbsp. Buttermilk
  • 1 Tbsp. Honey

* I used the cinnamon sugar butter from the popover recipe to “grease” the doughnut pan.Just for a little extra pizzazz.

Here was my process…

  1. Preheat the oven to 375 degrees F. Grease doughnut pan with cinnamon sugar butter.
  2. Combine all dry ingredients in a large mixing bowl. Whisk, and set aside.
  3. Combine eggs, buttermilk, Canola Oil and honey in another bowl. Whisk until mixture is foamy.
  4. Pour wet mixture over dry mixture and mix just until combined.
  5. Put dough into a pastry bag and pipe into each doughnut form until half full.
  6. Bake at 375 degrees F for 10  minutes.
  7. At 7 minutes, brush tops of doughnuts with cinnamon sugar butter.
  8. Remove from pan and let cool completely before glazing.
  9. While the doughnuts are cooling, you can whip up the glaze. I used 1/4 C. Brown Sugar, 1/4 C. Confectioners Sugar and added 1 tablespoon of Milk at a time until I got the consistency that I wanted.

These are a low fat doughnut so make sure to have at least two! They are light and not too sweet, and sooo easy to make.

Happy Baking!

Double Chocolate Coconut Cookies

I love coconut, but I am not a fan of chunks of it in my cookies! I love the tropical flavor and the how much fun it is to break one open. I also love Chocolate Chip cookies but you can only blog about the simple, yet delightful cookie so many times.

I was wandering through a little co-op type place in Randolph, Vermont when I found the solution to my cookie problem. Coconut Sugar?! As skeptical as I was, I bought it. I let it sit around for a week or so before I said, “What is the worst that can happen?” Fully knowing the answer I proceeded anyway. I mean, how terrible could it really be?

The cookies were amazing! The Coconut Sugar has the same effect as a brown sugar, and my cookies were buttery, crispy and chewy in the right places and an overall fantastic surprise.

So, you will need…

  • 1 1/4 C. All Purpose Flour
  • 1 tsp. Baking Soda
  • 1/2 tsp. Salt
  • 1/2 C. Butter, softened
  • 1/2 C. Coconut Sugar
  • 6 Tbsp. Granulated Sugar
  • 1 Large Egg White
  • 1 tsp. Vanilla Extract
  • 1/2 C. White Chocolate Chips, for the best flavor look for the white Chips that contain Cocoa Butter 😉
  • 1/2 C. Dark Chocolate Chips

Here was my process…

  1. Preheat the oven to 350 degrees F and line two baking sheets with parchment.
  2. In a medium bowl sift together the flour, baking soda and salt. Set aside.
  3. In a large bowl combine butter, coconut sugar, and granulated sugar. Beat with a wooden spoon until smooth. Feel free to use your mixer.
  4. Add the egg white and vanilla. Beat until well combined.
  5. Slowly add the dry ingredients in increments of your choosing until everything is well mixed.
  6. Stir in the chocolate chips.
  7. Drop spoonfuls of dough on to prepared baking sheets allowing 2 or so inches between each cookie for expansion.
  8. Bake cookies, one sheet at a time, at 350 degrees F for 10-13 minutes. Tops should be a rich golden brown, and somewhat firm to the touch.
  9. Let stand for around 5 minutes, then remove to cooling rack.
  10. Enjoy!

This is just a slight variation in ingredients, but a rather large variation in taste. served warm with a little  Talenti ‘Sea Salt Caramel’ Gelato or maybe a nice glass of Cupcake ‘Angel Food’ wine, or a classic glass of cold milk… no matter what, you will not be disappointed.

Happy Baking!

Vanilla Bean Marshmallow Squares

As “mature adults” we try to enjoy the finer treats offered. You give up the ring dings and the store-bought doughnuts for Creme Brulee and Passion Fruit tarts. You trade up, as you always should! But there are classics we all love, that can use a little fine tuning from time to time. Who knew that adding a teaspoon of finely ground vanilla bean could turn the ever tempting and delicious rice crispy treat into a gourmet treat worth its calories.

So, you will need…

  • 6 C. Rice Krispies Cereal
  • 1 Bag Marshmallows
  • 1/4 C. Butter
  • 1 tsp. Vanilla Bean, finely ground

Here was my process…

  1. Lightly butter a deep baking sheet or square cake pan.
  2. Combine Butter and Vanilla Bean in large pot over medium heat, let butter melt.
  3. Add marshmallows and stir constantly until completely melted.
  4. Remove from heat.
  5. Immediately Add Rice Krispy cereal and stir until well combined.
  6. Press mixture into prepared pan and let cool.

These treats are so easy to make, and the extra special kick of the Vanilla Bean brings this vintage recipe into the brave and exciting new culinary world. This sophisticated Marshmallow Square has a place in every home at any time. That is the beauty of classics, you don’t have to save them for a rainy day. 😉

Happy Baking!

Framboise Dream Meringues

First of all I want to say Sorry for my absence. Sometimes a gal must roam!

Who doesn’t love a delicious Prosecco? Framboise Beer is a fantastic  Raspberry Belgian Craft Beer, and lets face it ladies, if we are going to drink beer, it might as well be fancy beer. This is the Prosecco of Beer.

So, for my comeback recipe, I made a delicious Meringue cookie with Framboise and white chocolate. It is truly divine! It is light and airy, yet chewy as all meringue should be. They are sweet and delicate, just like me.

So, you will need…

  • 1/2 C. Confectioners Sugar, sifted
  • 3 Large Egg Whites, at room Temperature
  • 1/4 tsp Cream of Tartar
  • 1/3 C. Granulated Sugar
  • 1 Tbsp + 1 tsp Framboise Beer
  • 1/2 C. White Chocolate Chips

Here was my process…

  1. Preheat oven to 250 Degrees F and line two baking sheet with Parchment Paper
  2. Sift the confectioners sugar onto a plate and set aside.
  3. In a large bowl combine egg whites, cream of tartar and Framboise. Beat on medium until soft peaks form.
  4. Slowly add the granulated sugar and beat on medium high until stiff, glossy peaks form.
  5. Using a rubber spatula, gently fold in the confectioners sugar, then fold in the white chips.
  6. Drop the dough on the prepared baking sheets, you can sprinkle the baking sheets with powdered sugar to make them stick less, spacing them about 1 inch apart.
  7. Bake at 250 degrees F for 55 minutes. Remove from baking sheet and let cool.

These are so much fun to eat, and you really do feel a twinge of sexy sophistication while eating them. Plus you won’t need more than one or two of this ladylike treat, which is good for the midsection. Put on your best night wear, throw on an old classic, pour a glass of Prosecco, and have yourself a treat.

After all, Life is but a Meringue…

Happy Baking!